
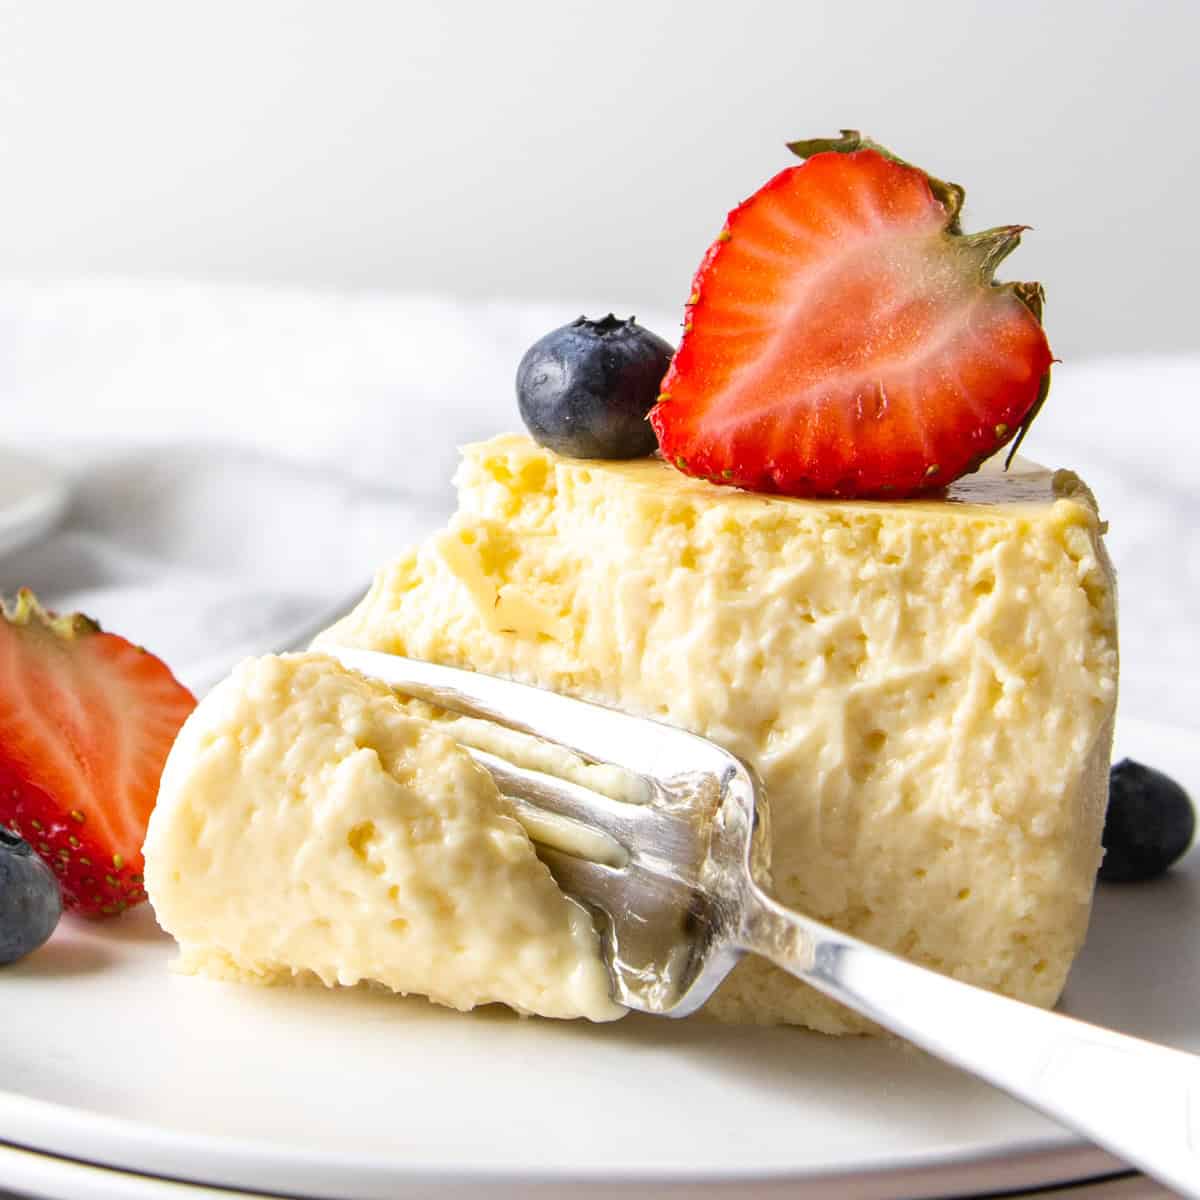
This delicious protein cheesecake is a creamy, high protein indulgence, packing 19 grams of protein into every serving!
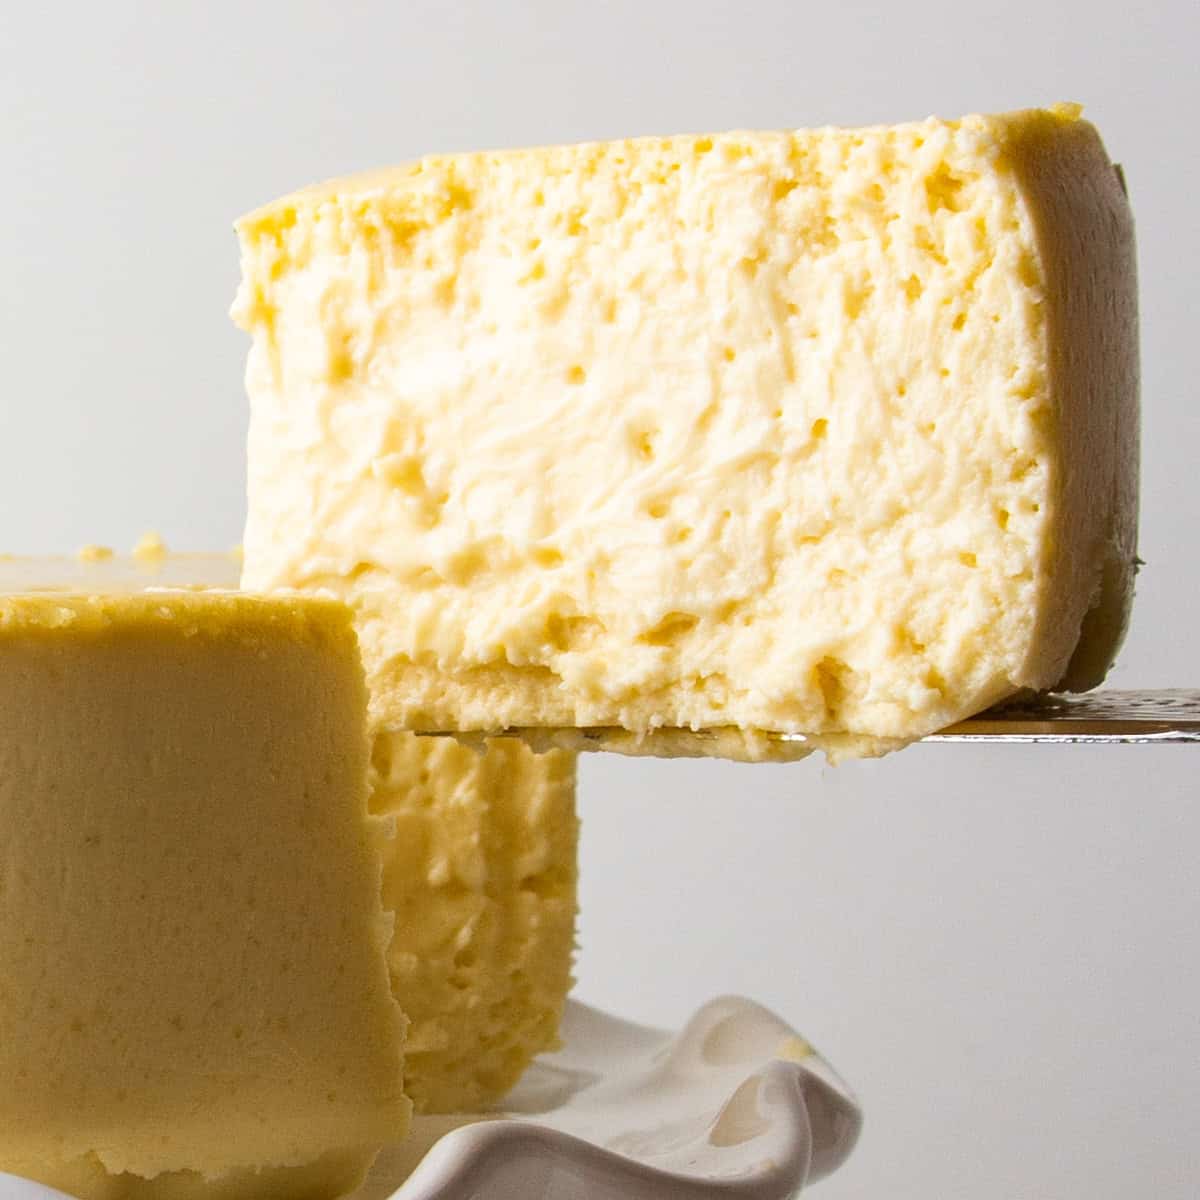
I created this recipe by modifying a family cheesecake recipe, making healthier swaps like Greek yogurt for sour cream, Neufchâtel cheese for cream cheese, and adding protein powder. See the Recipe Variations section below for more delicious high protein cheesecake recipes!
If baking a cheesecake seems a little daunting, try these easy no-bake protein cheesecake mousse recipes:
- This keto cheesecake mousse can be whipped up in just a few minutes. All the flavor of cheesecake without any of the baking.
- Add fresh raspberries for this high protein raspberry cheesecake mousse. Packed with flavor and indulgence!
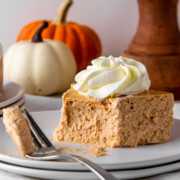
- And for pumpkin-everything season, try this pumpkin cheesecake mousse. A seasonal no-bake favorite!
Jump to:
Protein Cheesecake Ingredients
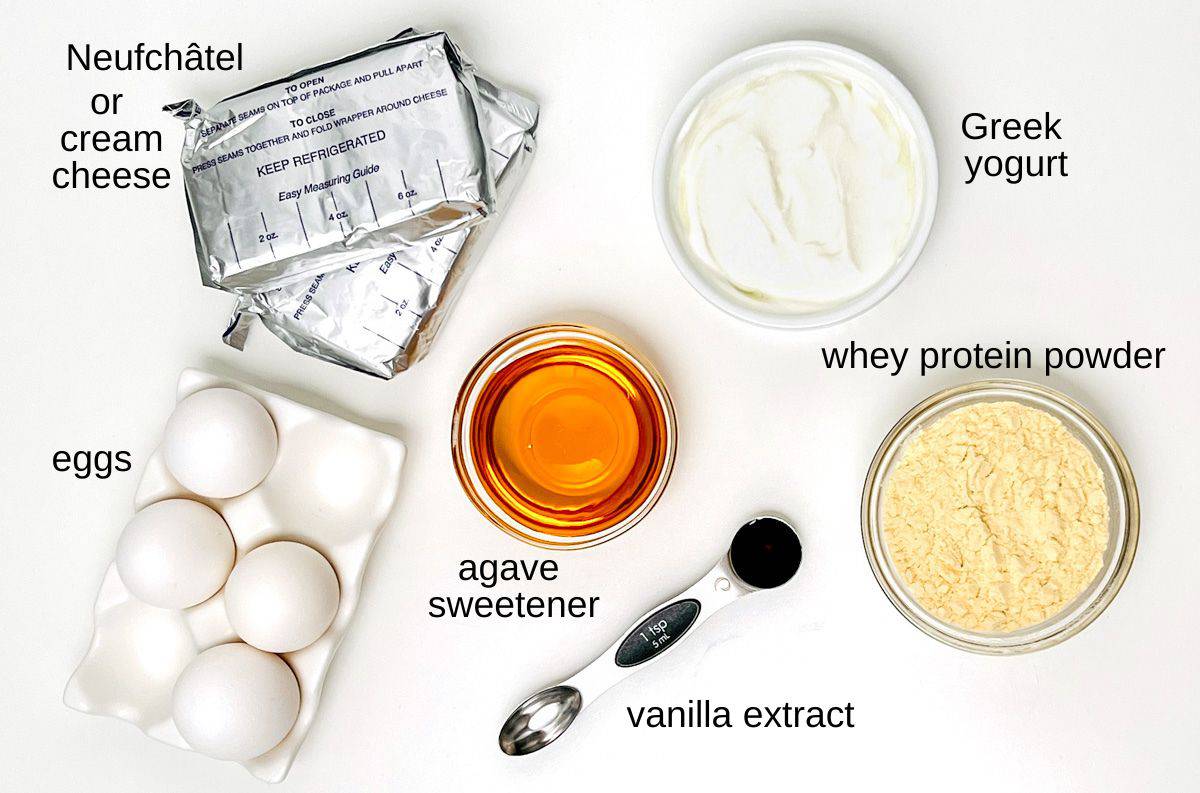
Neufchâtel cheese
Low-fat cream cheese that provides a creamy texture.
Agave nectar
A low-glycemic natural sweetener.
Eggs
Adds structure and richness to the cheesecake filling.
Fat-free Greek yogurt
Adds protein and a tangy flavor.
Vanilla extract
Enhances the classic cheesecake flavor. I like this baking vanilla.
Whey protein powder
Boosts the protein content without altering the taste. I suggest whey protein concentrate (rather than isolate) because it tends to bakes better.
I used unflavored whey concentrate. If you'd like to use vanilla whey protein, I suggest using one with a subtle flavor so the other flavors in the cheesecake can shine.
Equipment Needed
- 6" springform pan - if you'd like to use an 8" or 9" pan, double the recipe.
- Parchment paper - these 6" parchment rounds are perfect.
- Coconut oil - or non-stick cooking spray
- Aluminum foil
- Kitchen scale - highly recommended for best results
- Electric mixer - a stand mixer or hand mixer and mixing bowl
- Teaspoon measuring spoon
Instructions
- Preheat your oven to 325F (163C).
- Prepare the springform pan: Line the bottom with parchment paper and brush the sides with coconut oil. Wrap the bottom with aluminum foil.
- Cream the Neufchâtel cheese using an electric mixer.
- Add agave nectar and mix until combined.
- Add eggs one at a time, mixing well after each addition.
- Mix in Greek yogurt and vanilla extract until well combined.
- Incorporate whey protein into the mixture.
- Pour into the prepared pan and place in a water bath in the oven.
- Bake for 30 minutes at 325F (163C). Then reduce the temperature to 200F (93C) for about 50 minutes. The cake should be firm around the edges, but the very center should be jiggly. The cake should not be browning on top. DON'T OPEN THE OVEN during this process for best results.
- Cool at room temperature, then refrigerate for several hours before serving.

Ingredient Substitutions
- Neufchâtel cheese: Feel free to use regular cream cheese if you prefer. I'm not sure about fat-free cream cheese, as it is so different from Neufchâtel or cream cheese.
- Agave nectar: Substitute agave nectar with other natural sweeteners like honey or maple syrup. Or swap for low calorie or calorie free sweeteners, if you prefer. If you use a granulated sweetener, you may need to lessen the bake time. Check after 40 minutes at 200F in this case.
- Fat-free Greek yogurt: Sour cream would be fine here, if that's your preference.
- Whey protein powder: Any vanilla or unflavored whey protein concentrate should work here. Keep in mind that if the vanilla flavor is strong in the protein powder, that will come through in the cheesecake. A whey casein blend protein powder should work as well, but I suspect the bake time would be shorter (check after 30 minutes at 200F). Check out our article on the best protein for baking for more insight on baking with protein powder.
Recipe Variations
We have a bunch of variations on this high protein creamy cheesecake recipe:
- Graham Cracker Crust: Instead of using coconut oil on the bottom and sides of the pan, use butter and then press graham cracker crumbs into the bottom and sides of the pan. Gluten free graham crackers work as well as traditional, and you can use a food processor to easily make them into crumbs.
- Mini Protein Cheesecakes: These high protein mini cheesecakes are perfectly portioned and sweetened with stevia.
- Peanut Butter Swirl: Add a swirl of peanut butter to the cheesecake mixture once it is in the pan.
- Chocolate Chips: Sprinkle sugar-free chocolate chips into the batter for added flavor and texture
- Keto Cheesecake: Save 13 g carbs by using a sugar-free sweetener like stevia instead of agave, making this protein cheesecake keto-friendly (like we do in this single serve protein cheesecake recipe and in these high-protein sopapilla cheesecake bars).
- Meyer Lemon Cheesecake with Honey Hemp Crust: A sweet and citrusy twist on this creamy protein cheesecake recipe calling for hemp hearts, buckwheat honey, and the juice and zest of Meyer lemons.
- Pineapple Protein Cheesecake: A high protein version of the classic dessert with a protein crust and pineapple chunks.
- Cinnamon Apple Protein Cheesecake: A high protein, low sugar combo of apple pie and cheesecake. Delicious!
- Protein Cheesecake Brownies: Bake this cheesecake over high protein brownie batter. Double YUM!
Storage Info
- Refrigeration: Store in an airtight container in the refrigerator for up to 5 days.
- Freezing: Freeze individual slices for up to 3 months. Double wrap them in plastic wrap, then store in a freezer-safe airtight container. Thaw in the refrigerator before serving.
FAQ
Yes, regular, full fat cream cheese works well here, too.
Fat-free cream cheese is a very different product than regular cream cheese or Neufchâtel. It breaks down and gets runny when other wet ingredients are added. For this reason, I think the bake time would have to be a bit longer, but I haven't tried it myself.
A stand mixer or electric hand mixer works best.
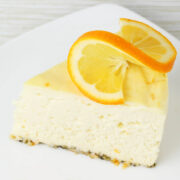
Yes, for a refreshing twist, add 1 tablespoon each of lemon juice and lemon zest.
Each serving (⅙ of the recipe) contains 19 g protein.
Line with parchment paper and brush with coconut oil. Then wrap aluminum foil around the bottom to prevent any leaks.
Place the springform in a larger baking dish and place on the oven rack. Then carefully add about 1" of hot water to the outer baking dish. This ensures an even heat distribution for the cheesecake.
Yes, either to the batter before baking, or drizzle on top before serving.
Each serving contains 18 grams of carbs when you use agave as in the recipe. If you swap for stevia, it will be 4 grams carbs per serving.
Enjoy this protein-packed cheesecake as a healthier alternative to traditional recipes. Whether you're following a macro based fitness plan or simply looking for a more healthy dessert option, this recipe hits the mark.
For more delicious healthy alternatives and high protein desserts, check out our Protein Desserts collection!
Recipe

BEST Protein Cheesecake Recipe (NY Style w/ Healthy Swaps)
Equipment
- oven thermometer highly recommended for best results
Ingredients
- All ingredients must be at room temperature.
- 2 8oz packages Neufchâtel cheese (low-fat cream cheese) (448g)
- ⅓ cup agave nectar 112g
- 4 large eggs whole (200g)
- 1 cup 8oz fat-free Greek yogurt (227g)
- 1 teaspoon vanilla extract
- ½ cup unflavored whey concentrate 40g
Instructions
- Preheat oven to 325F (163C).
- Prepare your springform pan by lining the bottom with parchment paper, and brushing the sides with coconut oil (or non-stick cooking spray). Wrap the bottom of the pan with aluminum foil.
- Using an electric mixer on medium speed (for a Kitchen-Aid type mixer) or low speed (for a hand-held mixer), cream the Neufchâtel cheese.
- Add agave, continue with mixer until well combined.
- Add eggs, one at a time, mixing well after each addition.
- Mix in Greek yogurt and vanilla until well combined.
- Add whey protein. Continue with mixer until well combined.
- If you see lots of air bubbles (from mixing), gently tap the bowl on the counter to let the bubbles release. This helps avoid cracks in the final result.
- Pour into prepared springform pan.
- Place pan in water bath in oven.
- Bake for 30 minutes at 325F (163C). Then reduce the temperature to 200F (93C) for about 50 minutes. The cake should be firm around the edges, but the very center should be jiggly. The cake should not be browning on top. DON'T OPEN THE OVEN during this process for best results.
- Remove from oven, and let cool at room temperature.
- Refrigerate for several hours (cake will continue to set) before serving.
- Enjoy!
Notes
-
- Neufchâtel cheese: Feel free to use regular cream cheese if you prefer. I'm not sure about fat-free cream cheese, as it is so different from Neufchâtel or cream cheese.
-
- Agave nectar: Substitute agave nectar with other natural sweeteners like honey or maple syrup. Or swap for low calorie or calorie free sweeteners, if you prefer. If you use a granulated sweetener, you may need to lessen the bake time. Check after 40 minutes at 200F in this case.
-
- Fat-free Greek yogurt: Sour cream would be fine here, if that's your preference.
-
- Whey protein powder: Any vanilla or unflavored whey protein concentrate should work here. Keep in mind that if the vanilla flavor is strong in the protein powder, that will come through in the cheesecake. A whey casein blend protein powder should work as well, but I suspect the bake time would be shorter (check after 30 minutes at 200F). Check out our article on the best protein for baking for more insight on baking with protein powder.
- Graham Cracker Crust: Instead of using coconut oil on the bottom and sides of the pan, use butter and then press graham cracker crumbs into the bottom and sides of the pan. Gluten free graham crackers work as well as traditional, and you can use a food processor to easily make them into crumbs.
- Peanut Butter Swirl: Add a swirl of peanut butter to the cheesecake mixture once it is in the pan.
- Chocolate Chips: Sprinkle sugar-free chocolate chips into the batter for added flavor and texture
- Keto Cheesecake: Save 13 g carbs by using a sugar-free sweetener like stevia instead of agave, making this protein cheesecake keto-friendly (like we do in this single serve protein cheesecake recipe and in these high-protein sopapilla cheesecake bars).
- Meyer Lemon Cheesecake with Honey Hemp Crust: A sweet and citrusy twist on this creamy protein cheesecake recipe calling for hemp hearts, buckwheat honey, and the juice and zest of Meyer lemons.
- Pineapple Protein Cheesecake: A high protein version of the classic dessert with a protein crust and pineapple chunks.
- Cinnamon Apple Protein Cheesecake: A high protein, low sugar combo of apple pie and cheesecake. Delicious!
- Protein Cheesecake Brownies: Bake this cheesecake over high protein brownie batter. Double YUM!
- Refrigeration: Store in an airtight container in the refrigerator for up to 5 days.
- Freezing: Freeze individual slices for up to 3 months. Double wrap them in plastic wrap, then store in a freezer-safe airtight container. Thaw in the refrigerator before serving.

Leave a Reply